06 November 2011

My junk journal / Smash book


These are all the rage on youtube and you can find heaps and heaps of videos on them and why crafters make them. Kinda reminds me of an Alternated book Miss Wendy is making for her brother - it's such a crack up. Can't wait to see the finished product.

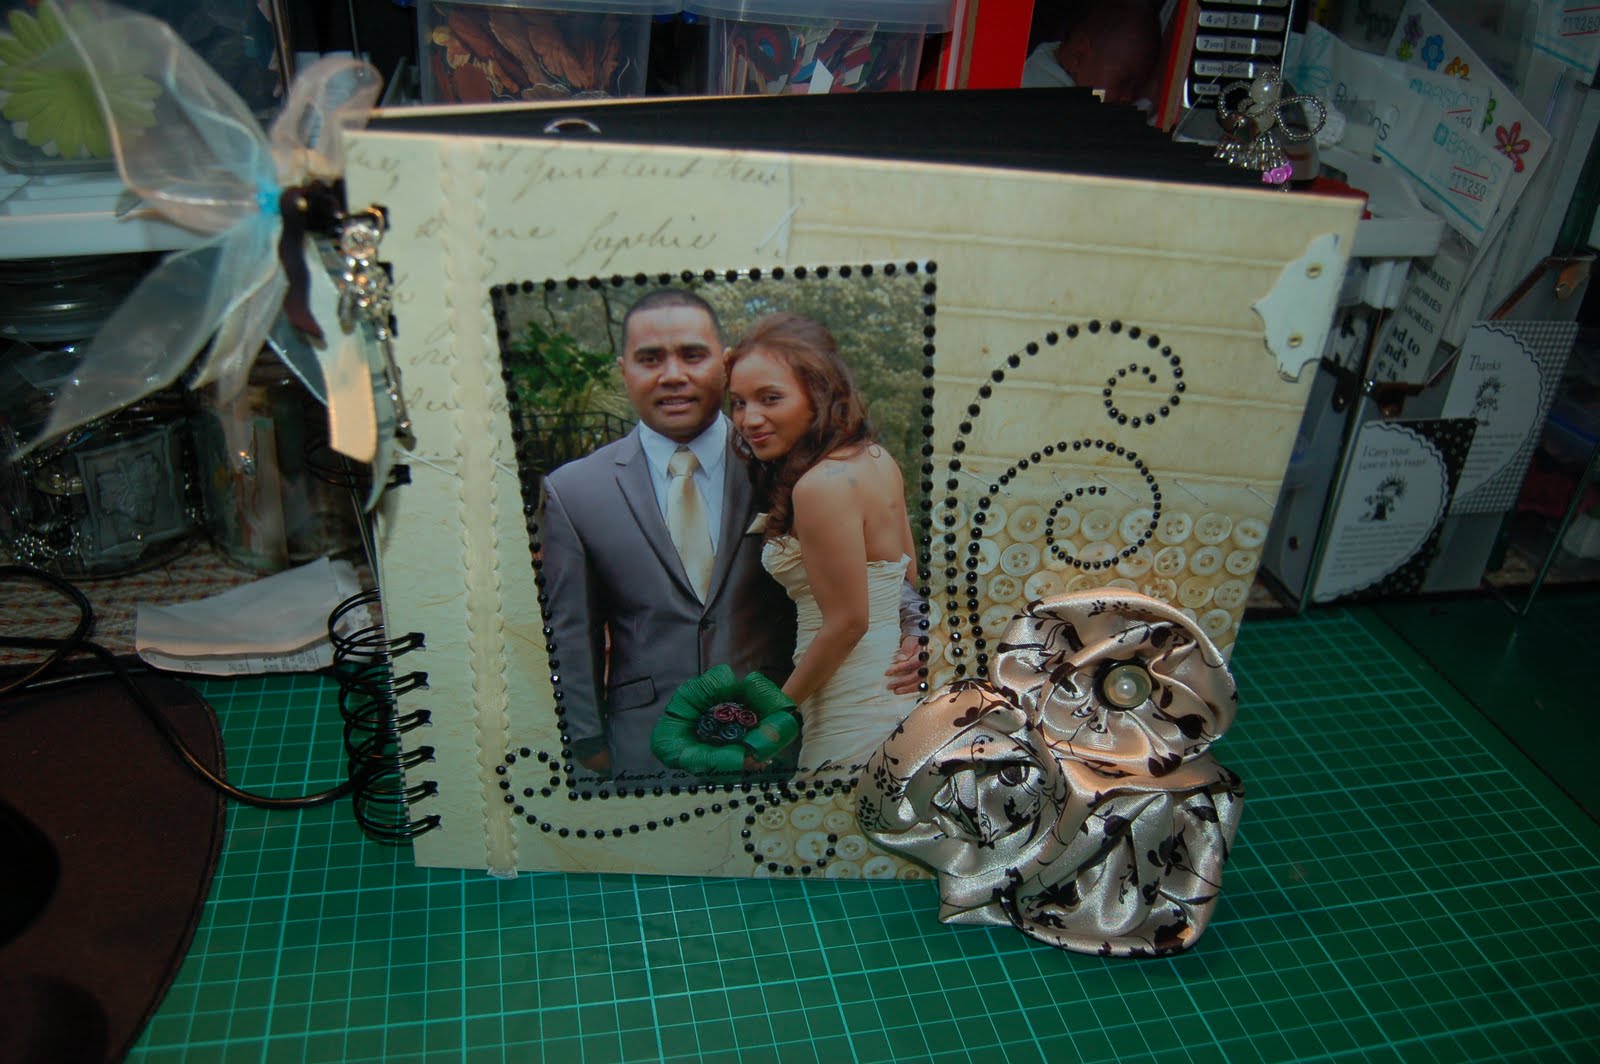
A junk journal or smash book which they are also know as; is when you use your craft scraps to make a journal - nothing has to match and it seriously is a good way to use up all those left over bits and pieces from completed projects.

Feeling totally inspired I made my own on Sunday, Sunday is usually a good day for crafting in our house. I usually get up fairly early, shower, have breakie and then hide away in my craft area for the rest of the day. Emerging only for food, arguments or/and much needed, necessary pit stops.

If you want to know why I've created it see my other blog: http://niueanprincess.blogspot.com/

23 October 2011

Scrapbook Retreat - Oct 2011 pt2


About a Boy
Love

Nz Census

Pie

Fashion

Grippers

21st

Scrapbook Retreat - Oct 2011

LAYOUTS OF AIKO

My Alan -
**I won the camp challenge with one

b.w.a - OR baby with attitude

Yum - Aiko eating raisans

Lil Mermaid

Lovely

Love
* I been on mission to use up the Rubon's that have been in my stash like forever!!!. I wanted it add a kinda tail, trailing behind the flower and to some degree I was successful.


Planking

Aiko
Here I took some rubons and then placed the title (aiko) on the top

all Girl

C'ankles


Flower Template

If you would like me to cut and send you a template (14.5cm x 14cm - aprox)
- please send a self addressed envelope to
Cocobunz D.sign
c/o 31 Woodglen Road
Glen Eden
Waitakere City 0602
Auckland
"sorry only for NZ residents"

This offer is only available to the 1st 10 post comments


Scrapbook Retreat - Work Space

Front view

Full side view

Close up - side view

Tools, Embellishments, Buttons

Patterned paper, Pre-plan layouts
*can you see the little blue basin - I used this to capture all the left over scraps etc once I had finished a layout. It made it very easy to sort through, come clean up time.


Left: snack /misc itemes
Right: Extra photo's, layout sketches, scraps, large templates, layout folder(right at the back)

13 October 2011

Wedding Mini Album

I was asked to make this mini album for my nieces friend who lives in Aussie but came back to Nz to get married as most of her family and friends are based in Nz.

I only took a photo of the front cover as there were over 20pages in this mini and most of the work is in the cover

Most of my time was spent on the photos - sorting through them, cropping some, enhancing others, creating focal points so I could then print of duplicates etc. A close second was after they were printed - making sure photo's were group together and finally culling them so you have a manageable amount to work with.

Supplies used:
Chipboard - Front cover
Pattern paper - covering the chipboard
Bazzill - on both the inside and inside back cover
Fabric rosettes - Easy to make (needle, thread, strip of fabric, card stock for the base and a hot glue gun)
Buttons - on the inside the rosettes layered to give it more depth
Acetate sheet - covering the photo, it was going to be an open and close flap but it didn't work out so I adhered it down and then hide the adhesive strip with ribbon.
Black pearl flourish - on the right handside of the photo
Black blink strips - around the photo and used for the bottom flourish
Ribbon and charms on the top ring to the album as an added embellishment
** I also used rubons, sandpaper, pinecone ink pad, white paper hinges, flowers covered in glimmer-mist and self adhesive pearl bling

25 September 2011

Better Scrapbooking Workshop - Sept + more

I'm so liking this template within a template buzz. Here I used a top note shaped template and then half a heart template for the journalling. I found a really cool poem that filled up the white space perfectly.


Finally finished my "orange" layout challenge for August


I took this photo with my phone and have been umming and arring over the what paper to use as the photo is not of the greates of quality. In hindsight I probably could have printed it in black n white or sepia.


Here I go scraplifting myself again - this is very similar to my "supa star" double layout.


Another set of photos in my stash waiting for the right paper to come along and say Yep we go together...I sound like a nut job don't I. But I know for a FACT their are others out there who do it too...lol.

24 September 2011

Mini Retreat - September 2011

Totally love love this one - not just because of the subject, but because if you looked at these two layouts separately, they are very individual in their own right but they you put them side by side it also looks like a double layout.


The patterned paper does all the work I mounted one of the photos and added a paper punch embellishment on the left to make photos pop. Then add some flowers and ribbon and your done


Here I let the photo do all the talking. A few strips of scrap pattern paper and journalling - done!


Favourite technique at the mo is is laying two paper punched stripes on top of each other (thanks Tania). Add some chipboard letters, journalling and embellishments. Super quick and easy.


I scraplifted one of my other layout to create this one and the cool thing about doing this is that no two layouts ever, ever look the same (check out Breaky date)


Another scraplift - again it looks different from the other one. These are the only 6x4 photos so I love being able to leave "white" space without it feeling incomplete.


Me thinks this one needs something red in the top left hand corner - any suggestions?


This technique I got from another scrapbooking buddy; Tracey. She had a done a layout using a template within a template so what do you do when you see something good - SCRAPLIFT!

23 September 2011

Hens night - Pimp cup


Never under estimate the power of glue gun and the $2.00 shop. My niece had a Hens night to go to, the theme is the Letter P. Now as you can imagine there are quite a few "obvious" options at the top of that list. In the end she decided to go as a female pimp..hehehe. And no self respecting pimp would be seen without a "pimp cup"

Items used:
Plastic cup from The Warehouse
Pink crown, silver $ sign necklace and bling from the $2.00
Hot Glue Gun

19 September 2011

Not much crafting going on

hi all,
it's been three weeks since my last post - boy does time fly. So whats been happening you may ask? Well not much

I did another supplies clear out with most of it going to my oldest son's former classroom and while I was there I had a nice little chat with his old teacher who is preggy again -must be something in the water as there have been a few pregnancies there in the past couple of years.

Re-organising my supplies so I can see them therefore use them.

I took advantage of Harvey Norman's 8c photo special a few weeks ago

I also attended a mini retreat if you like - over a couple of days and got 10 layouts done. Never been done by me before...ever, so I'm really please

I've started my "October Retreat" list - which consists of my personal, food and scrapbooking stuff for the days I'm away from home.

I've also made TP (toilet paper) Roll mini album which I will be teaching at the "October Retreat" complete with instructions and supply list. I have learnt alot from my last class and have made improvements to the way I deliver the class this time round. After the Retreat I will be added it to my blog, sorry no sneak previews.

I have a Scrapbooking Workshop coming up.

27 August 2011

Butterfly Kisses


Supplies provided by Better Scrapbooking Ltd

Materials use:
Bazzill
Bol-Bunny patterned paper
Pinecone Ink pad
Glossy Accents on top of the Title - Butterfly Kisses
Green flower shaped buttons
Sandpaper - round the edge of the photo

Manboots

Al had been mowing the lawn outside most of the morning and when he came in and took his boots off they just seem to be in the most perfect position for taking a photo.

Materials Used:
Bazzill
Basic Grey - Obscure / Haze
White Glaze pen - subtitle
White chipboard - title
Sandpaper around the larger/main photo to the left as well as the edge of the patterned paper
Manflower - Punches by Imaginisce
Metal Emblishment


Better Scrapbooking Saturday Workshop 27:08:2011

Birthday Bracelet


Phoenix was going to a friend's 19th Birthday held at an Inner City Hotel, it's seems to be the "thing to do" amongst our young adults these days. He wanted to take something special without breaking the bank. I suggested making a one of a kind bracelet for her - to which he screwed up his nose....typical. I myself think the finished results were bang on as they were in the colours she likes and judging from what he said when we picked him up she really did like it and wait for it...he also thanked me too...lol. So for me that's a job well done.

Colour Theme: Black, soft pinks and blues
(I added whites and browns to give it more depth and bulk)

Materials used:
Silver chain cut measure to fit
Silver closure and headpins (I used mainly short head pins)
Faux pandora charms ( I didn't have a silver ring large enough to go around it so i used a small chain and then a ring to close it and then attached it)
Buttons
Glass beads
Seed beads
Silver charms
Coloured heart was a mobile phone dangle charm.